
Imprimir STL Painel LCD Inclinado Flashforge Creator Pro Modelo 3D - 1452323
Things 3D Fila
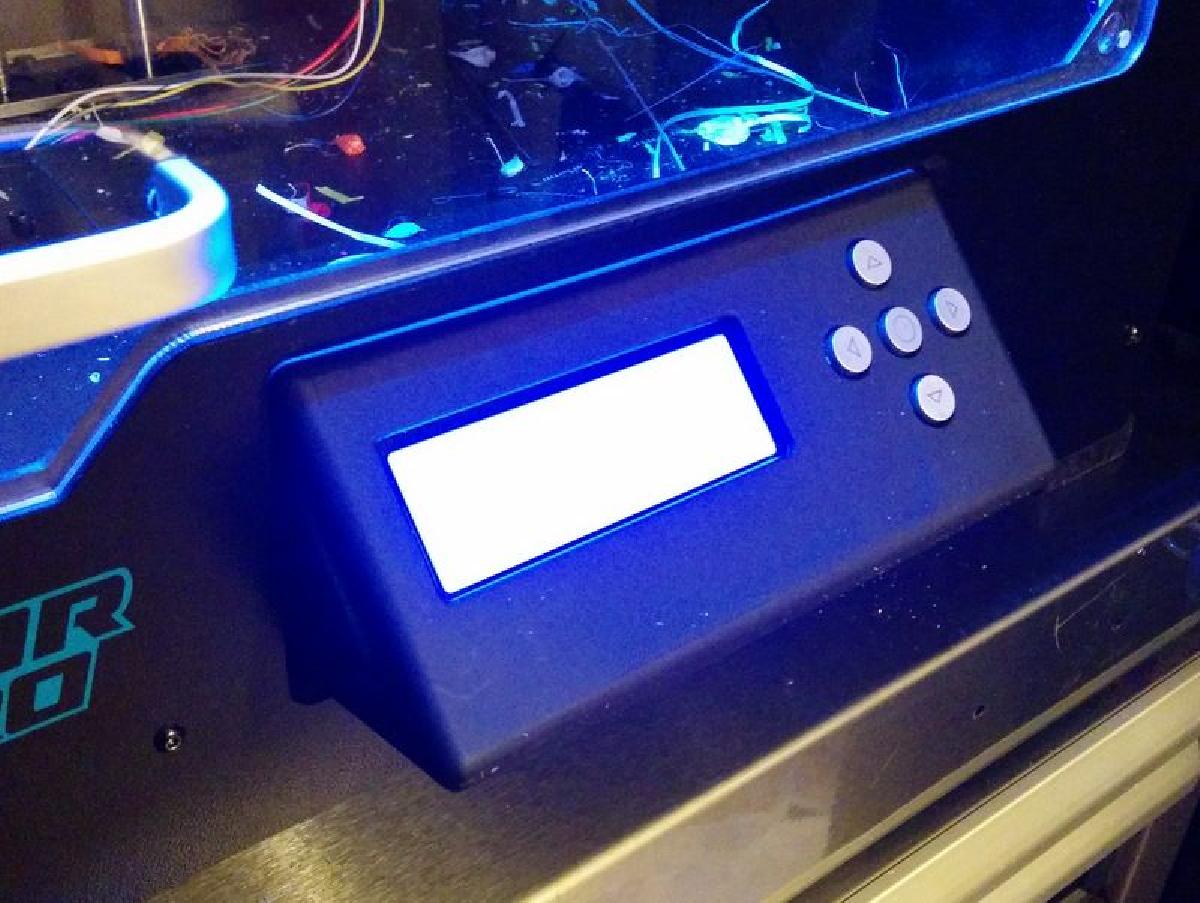
Painel LCD Inclinado Flashforge Creator Pro
Peças para impressoras 3D
Se você ainda não tem uma máquina para imprimir este arquivo pode comprar uma impressora 3d aqui!
Você pode imprimir este modelo 3d com estes filamentos ou com estas resinas 3D.
Sobre o objeto 3D Painel LCD Inclinado Flashforge Creator Pro
Este é um arquivo desenvolvido e projetado com ferramenta CAD.
Se você ainda não sabe criar seu próprio modelo 3D eu te ensino neste artigo tutorial sobre Tinkercad.
Painel LCD Inclinado Flashforge Creator Pro foi projetado para Impressora 3D. I love my Flashforge Creator Pro except for one ergonomic problem, when I stand next to it I simply cannot see the display because it is too low and is vertical. I need either to step back or bend down. Not anymore. This design provide a 45% slanted front panel that allows to see the display well from any distance.Design goals:Ergonomic front panel.Non destructive. FF can always be brought back to its original configuration. Can be printed on the FF itself.The design is provided here 'as is'. It works for me very well but may need a little bit tweaking, for example for more accurate PCB screw positions. Here are assorted notes from my build:I printed using ABS and support material from bed only. 4 shell layers, 20%, PEI bed, Simplify3D.I printed using white ABS, then post processed it (mostly scraping with a Stanley blade to clean up) and then painted a few layers of Krylon flat black spray paint.You need to get or build wire extenders for the two connectors. These are standard 0.1" mail/female dupont connectors/headers. I chose not to have the buttons lighted so didn't connect the bottom wire of the buttons PCB (if you do the same, you can also not connect the top 5 pins which are the leds wires).I used M3 threaded inserts that I pushed with a solder iron (let the heat to the job, don't push too hard). They are available from McMaster or ebay (search for knurled threaded inserts M3).One downside of this design is that when you stand very very close to the printer you can see a reflection of the LCD in the clear door of the FF. If it bothers you, you can cover the bottom of the door with a blue painter tape.To access the electronic box you need to remove the door and the black front panel of the FF. There are a few M3 black screws around the front and two smaller screws in the front toward the bottom of the printer.The PCBs are mounted with M3 x 5mm cap head screws.Overall
Não deixe de imprimir e compartilhar este modelo 3d. Não deixe sua impressora 3D parada. Mas se você não tem uma impressora 3D ainda, escolha a sua agora.