Imprimir STL Mover Mod do Joystick Modelo 3D - 2684186
Things 3D Fila
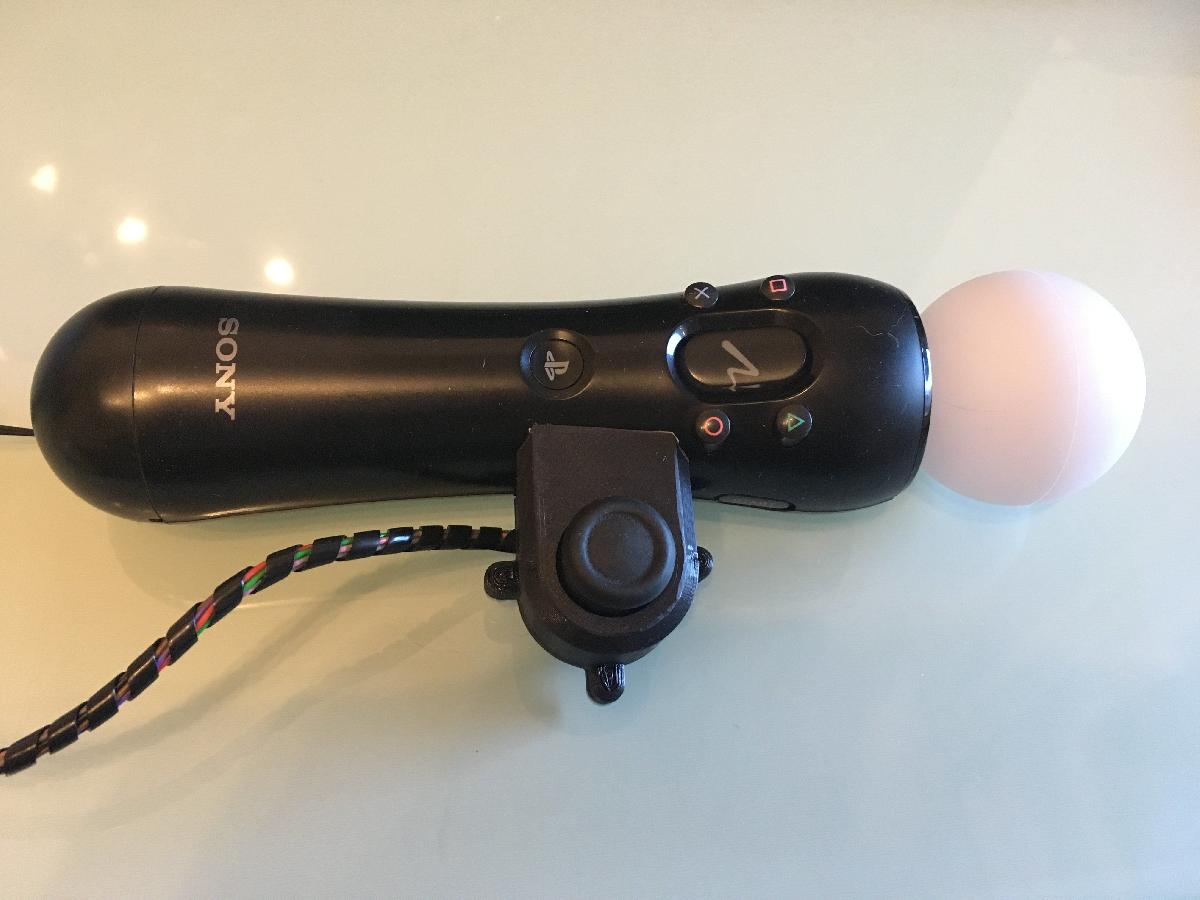
Mover Mod do Joystick
Jogos eletrônicos
Se você ainda não tem uma máquina para imprimir este arquivo pode comprar uma impressora 3d aqui!
Você pode imprimir este modelo 3d com estes filamentos ou com estas resinas 3D.
Sobre o objeto 3D Mover Mod do Joystick
Este é um arquivo desenvolvido e projetado com ferramenta CAD.
Se você ainda não sabe criar seu próprio modelo 3D eu te ensino neste artigo tutorial sobre Tinkercad.
Mover Mod do Joystick foi projetado para Impressora 3D. This is the first Version of the Move mounted Joystick mod. You will need an old or cheap third party Dualshock 4 to desolder the left joystick and use it for the communication to the Playstation later on.Still working on an easy way to mount the ds4 pcb with the accupack somewhere =/What you need :One Move_Joystick_A printedOne Move_Joystick_B printedOne Dualshock 4One Move ControllerThree M3x6mm ScrewEight Wires with 0,25mm^2 or less long enough to connect the joystick on the move to you ds4Optional:Plug in Connector for the Cable to unplug the Joystick if not neededTools:Screwdriver for the DS4 (PH0) and the type of screws you are usingOne soldering iron with at least 60 - 80 Wa little bit solderdouble sided tape or velcroBuild Instructions:!!!! Be careful at the disassembling of the Dualshock to not tear apart one of the connector cables of the Controller!!!!!Disassemble the Dualshock 4. After you remove the four screws it will be still attached by some snaps. If a snap or even all break at the disassemble don't worry the screws will be enough to hold it together later on^^A iink for the full disassemble: https://www.ifixit.com/Guide/DualShock+4+Left+Analog+Stick+Replacement/27764You can also remove the rumble motors to make the ds4 lighter.Desolder the left Joystick and solder the wires to the marked spots on the PCB.Optional: You can now build in the connector if you want.Put the DS4 back together (Just follow the guide in reversed order).Now solder the other side of the wires to the pins of the joystick and watch out to make sure that the correct wires are soldiered to correct pins. The wires are now an extension of the pcbs to the joystick.Now insert the Joystick in the two shells with the same direction that it had on the pcb and use the three M3 screws to close the shell.The last step is to attach the shell to the Move Controller. Use the double sided tape to do that. The organic shape of the move controller was hard to replicate in the cad program so the shell does not fit perfectly. Use more double sided tape in the center of the shell to make it fit perfectly and you are done^^If you want to add the right joystick to the second move as well mirror the the two halves of the shell and do it all over again^^
Não deixe de imprimir e compartilhar este modelo 3d. Não deixe sua impressora 3D parada. Mas se você não tem uma impressora 3D ainda, escolha a sua agora.