
Imprimir STL Espada Levin Modelo 3D - 1807103
Things 3D Fila
Espada Levin
Fantasia
Se você ainda não tem uma máquina para imprimir este arquivo pode comprar uma impressora 3d aqui!
Você pode imprimir este modelo 3d com estes filamentos ou com estas resinas 3D.
Sobre o objeto 3D Espada Levin
Este é um arquivo desenvolvido e projetado com ferramenta CAD.
Se você ainda não sabe criar seu próprio modelo 3D eu te ensino neste artigo tutorial sobre Tinkercad.
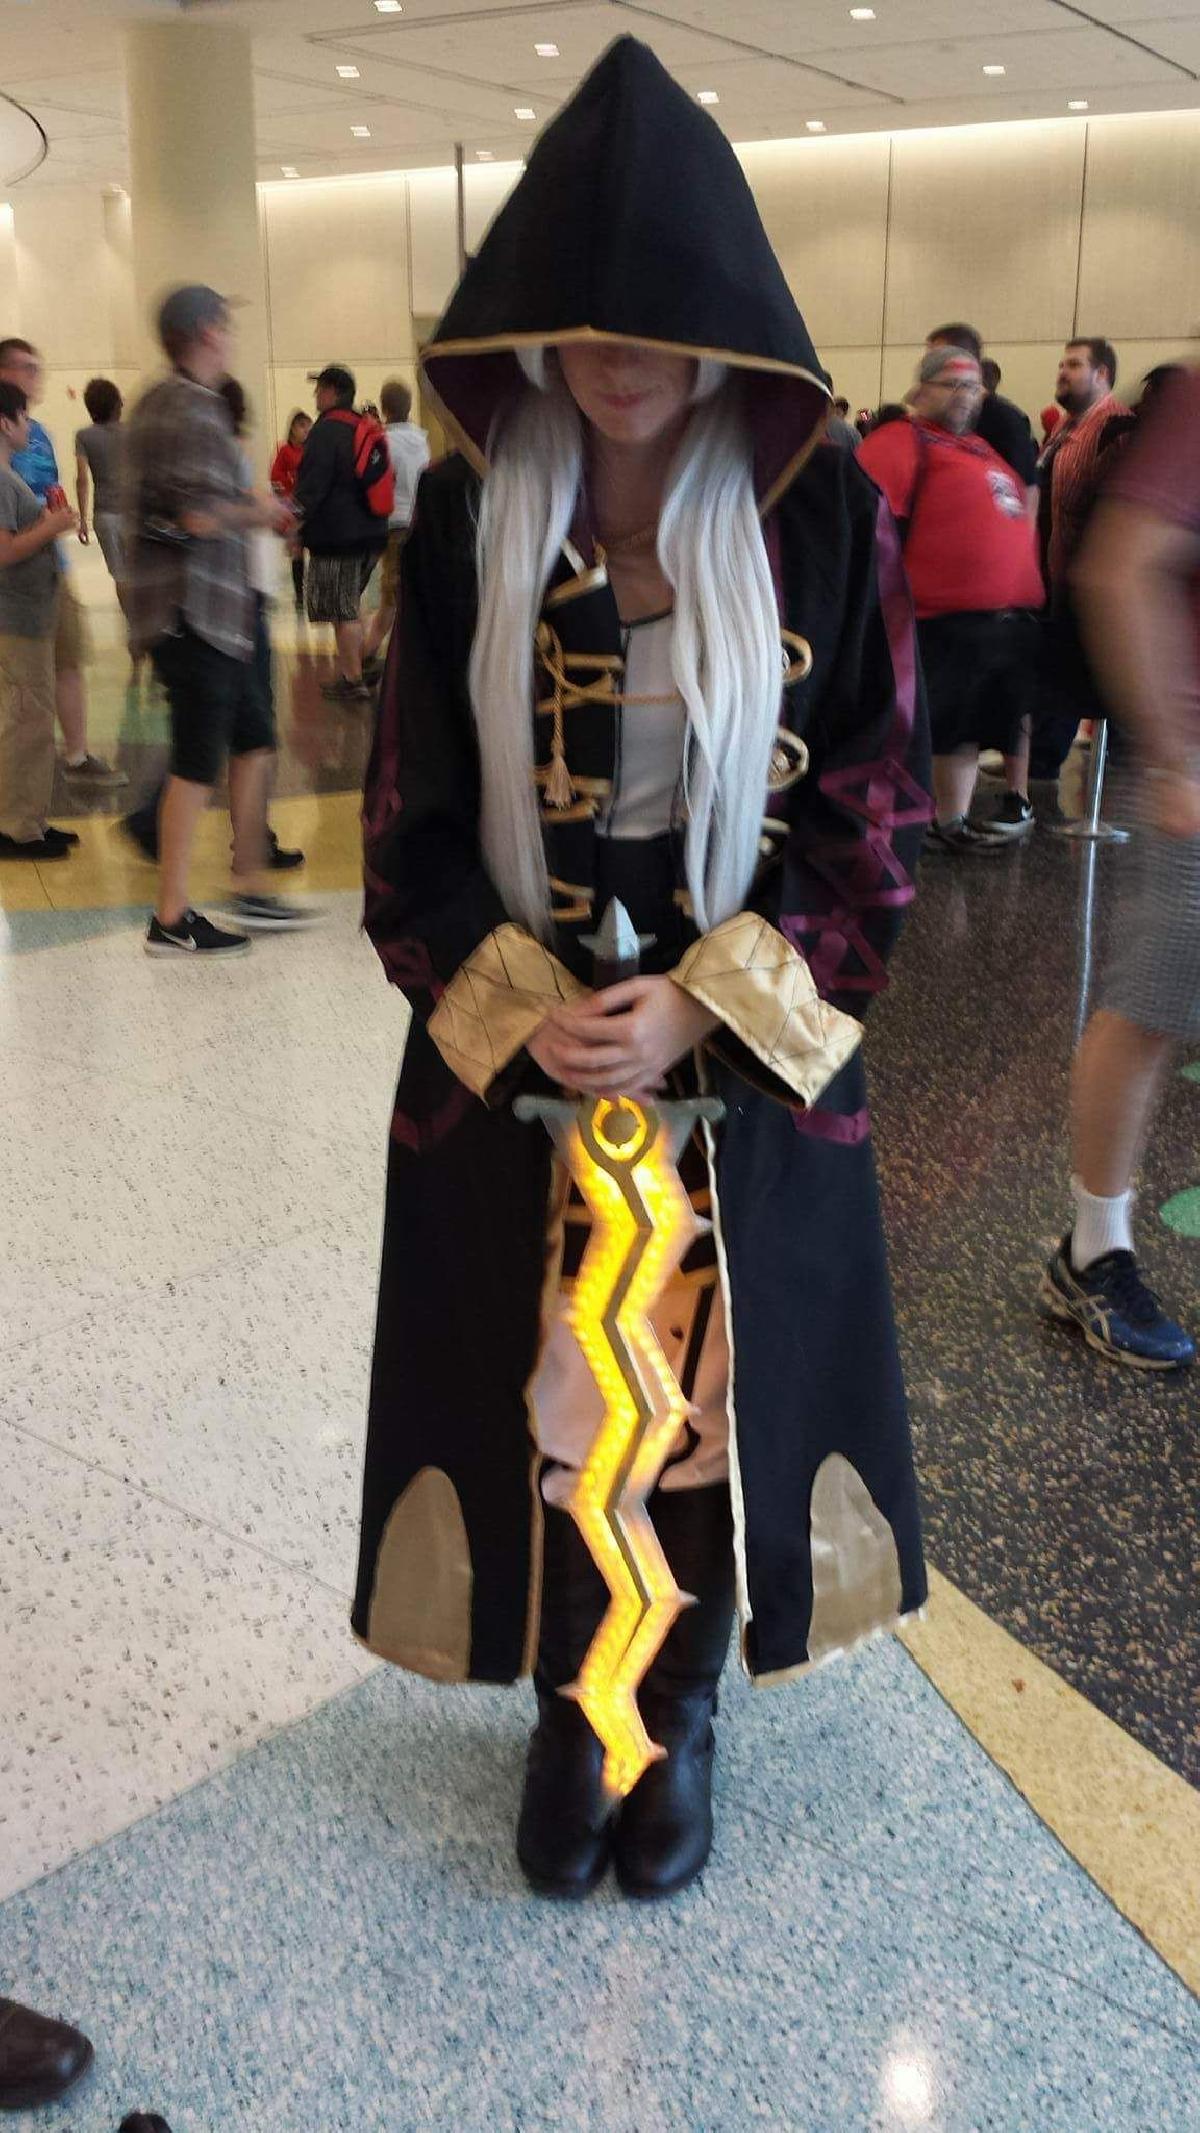
Espada Levin foi projetado para Impressora 3D. Here is a Levin Sword that I put together for a friend's cosplay at FanExpoCanada 2016. Submitting it now for the #CostumeChallengeThe bill of materials is relatively short:Transparent FilamentFaux Leather StripFlexible LED Strip - Warm White4x AA Long Battery holder3x 14500 AA batteries1x Dummy AA battery1x Tiny switch4mm⌀ metal rod - 20cm should be enoughHalf-Remembered Step-By-Step InstructionsOnce the parts are printed you'll want to glue them together.I used epoxy resin and put it together in 2 halves first.Then I superglued the LED strip into place and lined the halves up.Then I cursed myself for not paying closer attention to which parts coincided with which parts, took one side apart, put it back together, then glued both halves together.Next I glued the gems on, measured how much of the metal rod I would need to insert into the main body & grip to strengthen that join and glued that in place too.After this it came time to fill all the gaps in the joinsSince I wanted it to allow light through I used layer after layer after layer of epoxy resin to build up the areas that had gaps/dips in the body until they were flush with the rest of the sword. This part took the longest by far, please do this in a suitably ventilated area and with a respirator, lungs are important OK?Once the gaps were filled and I was happy with the state of the sword I hung it from the rafters in my garage and applied a layer of XTC3D in an attempt to get the surface as smooth as possible.After this had dried I sanded it by hand with some high grit sandpaper to smooth it out as much as I could.It was at this point that I dropped it on the arm of my chair and snapped it in half, tearing the LED strip in the process. I would advise against following this particular step.If you did not skip the previous step you'll need to take a rotary tool and cut away 2 sections of the blade on either side, find the broken contact in the led strip and repair it with a soldering iron and some wire, all the while re-printing the pieces that you cut away and cursing the fact that you dropped it.After the sword is sanded flat and you are happy with how it looks, it's time to mask it off for paint.You can see in the attached pictures how I masked mine off, it's not a work of art but it got the job doneI used a single layer of Valspar Pewter Hobby Enamel on the blade as I quite like the metallic effect it gives.The non-blade parts were Valspar BrassNext I used a thin faux leather strip to wrap the handle to give it a more authentic look, this is quite easy but I think it looks great.At this stage everything was ready, so I put some batteries in and realised I had way too much wire inside the handle for the pommel to close flush with the body.I took some dupont connectors and cut them as necessary, then soldered male/female ends to the appropriate pins on the switch, and to the wires coming from the LED strip and the battery box. I have 0 electrical training and guessed my way through this, I'm sure you'll be fine - if not, feel free to ask!Finally I hit the switch and all was well.If you made it this far I'd like to congratulate you on suffering through my rambling memories of the process, I really need to work on documenting things as I do them.If you have any interest in seeing some more of the things I make you can check out my instagram
Não deixe de imprimir e compartilhar este modelo 3d. Não deixe sua impressora 3D parada. Mas se você não tem uma impressora 3D ainda, escolha a sua agora.