Imprimir STL Caso uBITX Modelo 3D - 2925336
Things 3D Fila
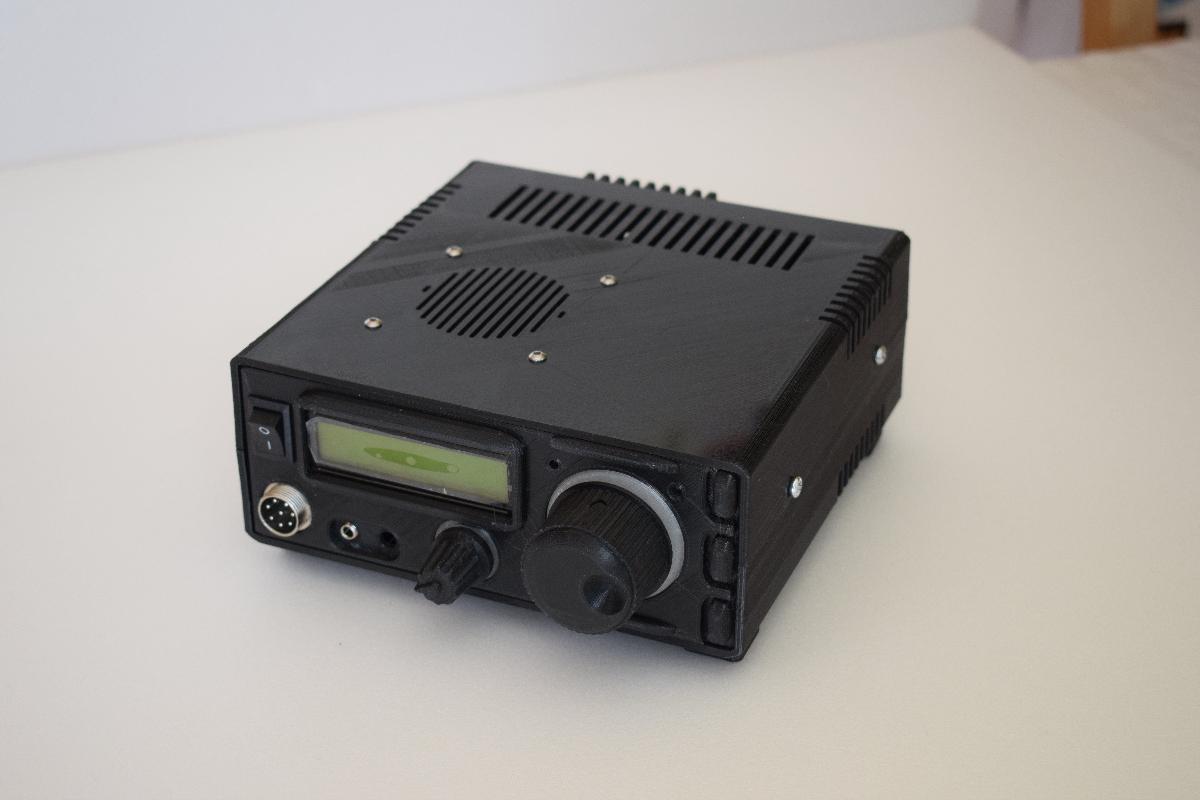
Caso uBITX
Eletrônica
Se você ainda não tem uma máquina para imprimir este arquivo pode comprar uma impressora 3d aqui!
Você pode imprimir este modelo 3d com estes filamentos ou com estas resinas 3D.
Sobre o objeto 3D Caso uBITX
Este é um arquivo desenvolvido e projetado com ferramenta CAD.
Se você ainda não sabe criar seu próprio modelo 3D eu te ensino neste artigo tutorial sobre Tinkercad.
Caso uBITX foi projetado para Impressora 3D. This is my version of an enclosure for the popular uBITX HF transceiver in its unmodified form. Well, mostly unmodified. I had to use a separate volume control and power switch because the original was too bulky. The 3.5mm phono mic jack was ditched for a GX16 mic connector. I chose an 8-pin because most mics I have use this.Some additional materials needed:12vDC SPST rectangular rocker switch, 15x21 mm (refer to drawing)10k volume potentiometer with 17mm diam housing, shaft 6mm diam x 11.5mm long.GX16-n microphone jack where n is number of pins. Minimum for uBITX is GX16-312vDC blower fan, 40x40x10 mm. Current rating (in A or mA) not critical.8 or 4 ohms, 2.5" diam round speaker.M3 3x30mm nuts and bolts for the mainboard/cabinet feet.M4 4x15mm nuts and bolts to hold the cabinet together.I increased the diameter of the mounting holes for the mainboard to give some play when sliding in the front panel into the mainboard LCD assembly. The 3.5mm phone jacks at the front have the same purpose as the back, speaker and key. There are 2 holes besides the VFO knob meant for Pwr and TX LED indicators. Use copper or aluminum tape on the inside of the enclosure. It should help with interference and with heat coming from the PA transistors. The fan blower should help and in my opinion should direct air out instead of in. Be careful not to ground the PA heatsink as it shouldn't be connected to ground. You can also use conductive paint for shielding but it is pricey.NOTE: You should print the knob rings at 100% infill with transparent (clear) filament if you want to put LED backlights on the rings ... it should give a nice glow around the control knobs. I'll add basic LED holders later to the build.The volume knob is a remix of the work done by marmil:https://www.thingiverse.com/thing:2243413and the VFO knob from tranter:https://www.thingiverse.com/thing:2469591REVISION 1 - 02/06/18Corrected a small mistake on my part. I have readjusted the speaker placement further back. It turns out one of the speaker's mounting screws is pressing on the 8-pin connector of the Raduino. The old STL file for the Upper Shell had been replaced with a corrected one. Those who already printed the old STL can still use it by getting rid of the Speaker Holder and screws and glue the speaker to the case, or simply remove the offending screw. Apologies.REVISION 2 - 08/06/18Uploaded an optional Back Panel that includes cutouts for a panel-mounted fuse holder and mini-B USB port. The fuse holder can be the standard or low-profile type; they have the same cutout diameter. The DC coaxial jack also has the same cutout diameter. The only thing to take note of is to mount the fuse holder ABOVE the coaxial jack so that it clears the uBITX mainboard power connector inside the case.I intentionally left out the cutout for the mounting screws of the mini-B port and will leave it up to the builder to drill a couple of holes. There is no standard for the mounting holes and I don't want people having a hard time sourcing a specific mini-B USB cable which may not be locally available. REVISION 3 - 21/06/18A couple of people had problems printing the Volume Control Knob due to corruption of the object. I have uploaded a different knob from tranter's work, named Volume Control Knob v2. Also, a request to bring the VFO knob closer to the panel by a few more millimeters, now done with VFO Knob v2.The LED backlight mounts have been uploaded, but be warned - the space is very cramped. I have included an image to help visualise the mounting position of the LEDs. REVISION 4A new remote head enclosure has been uploaded at:https://www.thingiverse.com/thing:3016678The remote head uses a 3.5" Nextion touchscreen and designed to connect to this main box with a shielded cable. A new front plate has been added here for those who want to still use the main box with a DB25 D-sub connector. Those who don't want to use the DB25 and wire directly, I have included cable thru plates for 6mm, 8mm and 10mm shielded cables. The ON/OFF switch remains on the main box.
Não deixe de imprimir e compartilhar este modelo 3d. Não deixe sua impressora 3D parada. Mas se você não tem uma impressora 3D ainda, escolha a sua agora.